As most audio types will say, gear counts. And they are right, but to an extent. However, the thing you won’t hear because it is sold, at least to me, by someone who wants to sell a 300 dollar microphone, is that you can indeed achieve impressive-sounding studio quality recordings with a cheap microphone, provided you know how to work against its limitations.
The cheap mics are not useless. They are raw and raw. Consider them as a base model car, you will not become a winner overnight, but with some wise mods and a bit of tuning, they can take you further than you imagine.
Market research firms estimate the dynamic-microphone segment is worth hundreds of millions to >USD 1 billion globally and is forecast to grow at mid-single-digit CAGRs through the decade (figures vary by report and sub-segment).
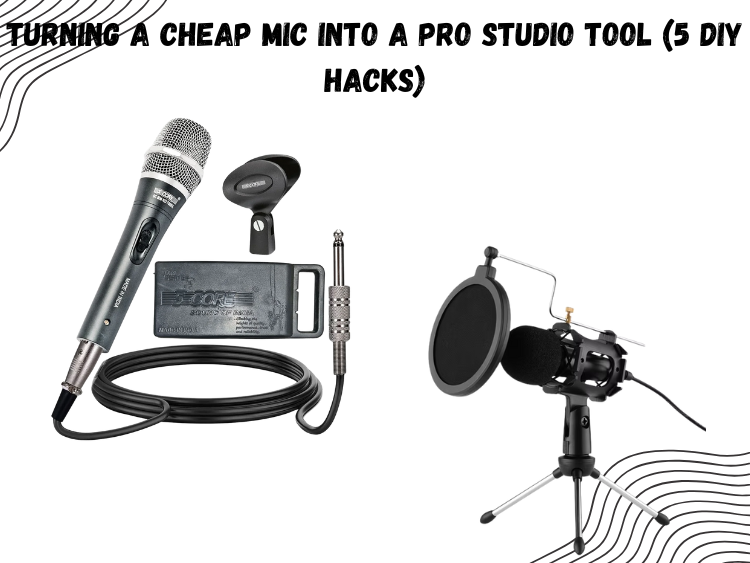
Following this guide will take five simple, inexpensive, do-it-yourself tricks that will turn any budget microphone into a stable studio device (at least with entry-level models of the Ammoon 3.5mm Condenser Mic or the durable 5 Core ND-7800X Dynamic Vocal Mic).
1. Kill the Noise with a DIY Pop Filter
Plosives—those explosive P’s and B’s—are the bane of cheap condenser mics. Even decent dynamic mics can suffer if you’re recording close-up. The fix? A pop filter.
If you don’t want to shell out for one, make it yourself. Grab a wire hanger, bend it into a circle, and stretch a pair of pantyhose over the top. Mount it to a stand or tape it in front of the mic. Just like that, you’ve added a layer of protection against harsh vocal spikes without spending a dime.
This simple fix is essential for mics like the Ammoon, which are notoriously sensitive to sudden bursts of air.
2. Build an Isolation Shield (with Stuff You Already Own)
Background noise and room reverb are two of the biggest giveaways of a cheap mic recording. You don’t need an acoustic booth—but you do need some isolation.

Stack pillows, hang thick blankets, or build a box lined with foam around your mic. Even egg cartons can help cut reflections in a pinch. The goal is to deaden the sound around the mic—not the whole room. This is especially effective with cardioid dynamic mics like the 5 Core ND-7800X, which reject noise from the sides but still catch echo from the front and rear if your space is untreated.
Bonus: you’ll also get a tighter, more focused vocal tone.
3. Use a Better Stand—Stability = Sound
Cheap mics usually come with even cheaper stands. Wobbly desk tripods, plastic clamps, or clip-on arms that make you nervous every time you move them.
Stability matters. Any vibration or contact noise travels straight into the mic body, especially with condenser designs. Upgrade to a heavy, weighted base or a solid boom arm. If you’re sticking to DIY, tape the stand to your desk or floor and isolate the mic with some rubber bands to reduce transfer noise. Even better—mount the mic to a mic shock mount if it fits.
For dynamic vocal work, a good stand transforms how something like the ND-7800X performs in live vocal tracking. It keeps your setup locked in and hands-free, so you can focus on the take—not the tech.
4. Tweak the EQ Like You Mean It
Most cheap mics share a common flaw—they lack polish. The high end is too brittle. The mids sound boxy. The lows? Either muddy or non-existent.
That’s where EQ comes in.

When it comes to EQ, guesswork is your worst enemy. As The Pro Audio Files points out in their vocal EQ guide, the smartest approach is to listen for specific trouble spots and fix them with surgical cuts rather than sweeping changes. For example, if your cheap condenser is muddy, trimming the low-mids around 200–400 Hz will clean things up fast.
In the case of a dynamic such as the 5 Core ND-7800X, which requires a little more bite, a light high-shelf boost at 8-10 kHz will brighten the sound without making it harsh. The trick is in subtlety–smoothing out what is there rather than trying to make it sound like a mic it is not.
Dialing in these subtle EQ moves won’t fake a high-end mic—but they’ll definitely trick your ears into hearing one.
5. Ditch the Onboard Sound Card
This is the single biggest leap you can make without replacing the mic itself. Most budget users plug their mic directly into their PC or use the built-in 3.5mm jack. That’s a problem.
Onboard sound cards are noisy, underpowered, and often introduce latency. A basic USB interface (like a Focusrite Solo or Behringer UMC22) instantly boosts clarity and gain control. If you’re working with a mic like the 5 Core ND-7800X, which uses XLR, this is a must. For 3.5mm mics like the Ammoon, a USB sound adapter can still offer cleaner signal than your laptop input.
Small upgrade. Huge result.
The Bottom Line
A cheap mic isn’t a dead end—it’s a starting point. With a few household tools, some clever positioning, and a little EQ discipline, you can push budget gear far beyond its price tag.
Start by treating the sound around the mic. Isolate it. Stabilize it. Filter the plosives. Then clean up the signal chain and sculpt your EQ like a pro. Suddenly, that $20 condenser or budget dynamic starts behaving like something worth five times as much.
The 5 Core ND-7800X already punches above its weight thanks to its metal build and focused cardioid pattern—but give it the right support, and it becomes a serious recording tool. The Ammoon condenser, though designed for casual use, can surprise you once you eliminate the noise around it.
End of the day? Great sound isn’t bought. It’s built.
Here you can find amazing drum thrones; alternatively, browse our product page to find the best keyboard bench, audio mixers, drum mics, piano bench, keyboard stand, speakers, party speakers, and more.